
A good up and down wall light throws two controlled beams, one rising and one falling, straight along the surface it’s mounted on. No floodlight glare, no light blasting into your neighbour’s bedroom. Just clean vertical shapes that make a wall look layered rather than flat.
To understand why this works, it helps to know two classic techniques:
- Wall washing
Position wide-beam light fixtures approximately 300 mm or more from the wall to illuminate smooth render evenly and minimise shadows. - Wall grazing
This keeps the light source within about 150 to 300 mm of the surface, so a narrow beam rakes across it and throws crisp shadows into stone joints, brick edges and timber battens.
Surface-mounted up-and-down lights behave like bidirectional grazers. Tight beams carve sharp, hourglass-shaped cones across textured stone. Wider spreads soften into overlapping washes on smoother finishes. Either way, the effect is dimension, and dimension is what makes a façade look expensive.
Which up-and-down options are available?
At Bondilights, we’ve been designing and building outdoor lighting since 2002. Based in Bondi, our gear is made with coastal conditions in mind. Two models are built specifically for this effect:
- LED Cube Wall Light Up & Down
A compact square profile that suits entry piers, columns and garden walls.
- LED Wedge Wall Light Up & Down
A sharper, more sculptural shape that works beautifully beside doors, around garages and on BBQ walls.
Both are available in solid copper or electroplated 316 marine-grade stainless steel, with warm or cool white options, and include brackets.
The beauty of a three-layer scheme
A single porch downlight isn’t a lighting plan. The homes that really sing use three coordinated layers:
- The façade layer
Install a pair of Wedge or Cube up-and-down sconces on either side of the front door. They frame the threshold, pick up the cladding texture and signal “this is the entrance” from the street. Flank the garage doors too, and you’ll eliminate those shadowy blind spots that make a house feel unwelcoming. - The circulation layer
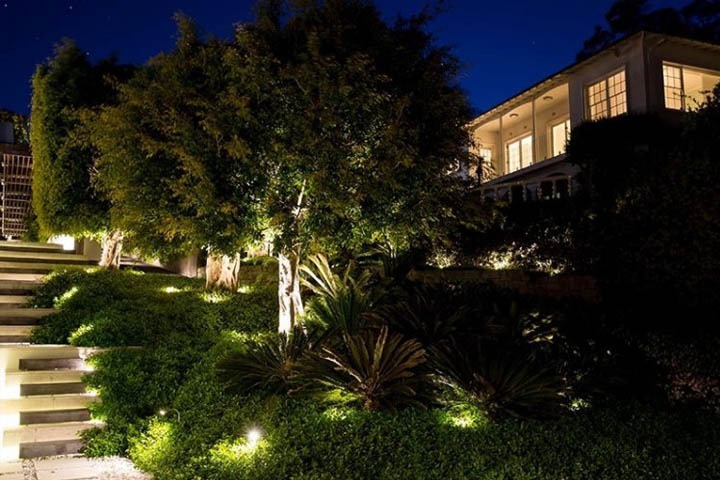
People need to see where they’re stepping, without being dazzled. Bondilights’ LED 35° Recessed Wall Lights (Circle and Square profiles) send light downward at 35 degrees along paths and driveways. The compact Piccolo 20 and Piccolo 40, developed with LA Lounge Lighting Architects, come with Hat, Hood or Eyelid glare shields and wash stair treads while leaving risers subtly shaded. Safe, but still moody. - The landscape layer
Add swivel-arm LED Pivot Lights (LTWP12) and IP67 LED Strip Lights to tie patios, BBQ walls and feature shrubs into the scheme. Now the whole property reads as one composition instead of a collection of random lights.
Always match the light to the material
Colour temperature is where many DIY schemes go wrong. The same fitting can make sandstone glow or turn it a muddy grey-green. Here are some tips:
- Warm white (2700K to 3000K) enriches sandstone, red brick and timber. For most Sydney homes, this is the safe bet
- Neutral white (around 4000K) suits stark white or grey concrete and render
- Cool white (5000K to 6500K) strips warmth out of natural materials and flattens stained timber
Stick to one Kelvin range per zone so the scheme doesn’t clash. Most of our fittings come in 3000K warm or 5300K cool, but before you commit to forty fittings, test a 3000K sample against your masonry after dark. Ten minutes with a torch-sized test beats an expensive regret.
How do I get the mounting height right?
Placement makes or breaks the look. As a general guide:
- Entry sconces should be around 1.7 to 1.8 m above finished floor level, measured from the top landing above the entry steps
- Garage and patio lights should sit at roughly 1.8 to 2.0 m
- Stair and path fixtures should be placed low, at about 200 to 300 mm
Also leave the wall above any up-and-down fitting unobstructed. Mounting one hard under a porch soffit and the upward beam slams into the ceiling, creating a glaring hot spot. Under low eaves, go for downward-only sconces instead.
Spacing matters on wide elevations too. Space fittings to match the beam spread, or you’ll get scalloping (dark gaps between bright arcs) or harsh hot spots on pale stone.
Keep the neighbours and the council happy
Dense suburbs and bushland fringes are increasingly covered by AS/NZS 4282:2023, the standard for controlling the obtrusive effects of outdoor lighting. Updated in November 2023, it sets spill and glare limits across environmental zones E0 to E4 and covers nocturnal wildlife and human neighbours. Many councils are building it into their Development Control Plans.
Practical ways to stay on the right side of it:
- Treat upper windows and boundary fences as no-light zones.
- Mount fixtures level, not tilted outward.
- Favour 2700K to 3000K optics near waterways and bushland.
Up-and-down lights suit this brief well because the beam stays on the wall rather than escaping into the street.
Your pre-sign-off checklist
Before you lock in a lighting schedule or rough-in conduit, run through these five checks:
- Walk the elevation after dark and map upper windows, boundaries and wildlife buffers against AS/NZS 4282:2023 zones.
- Pair narrow 2700K to 3000K up-and-down beams with sandstone, brick, or timber, and wider neutral washes with smooth render.
- Set entry fixtures at 1.7 to 1.8 m, and confirm wall clearance beneath eaves.
- Specify IP65 to IP68 electroplated 316 stainless, solid copper or solid brass for coastal durability.
- Get your licensed electrician involved early for weatherproof 12 V DC transformers and correct wiring under AS/NZS 3000:2018.
Ready to upgrade your lighting?
Great façade lighting isn’t just adding more light; it’s putting the right light in the right spot, so your home’s textures, entry, and proportions do the talking after sunset. Let our expert team help you with this today.